

Nail Care at Home: A Step-by-Step Guide
Cutting your toenails might seem like a simple task, but not doing it correctly can lead to discomfort, pain, and even problems like ingrown toenails.
Here's your step-by-step guide to doing it right:
Step 1: Gather Your Tools
You will need a pair of sharp, straight-edged toenail clippers or scissors.
I personally prefer nail scissors, as they give you more control (and you're less likely to split your nails), but your tool of preference is a personal choice.
Please avoid using fingernail clippers. They are typically too small and curved, which could lead to improper cutting or splitting of your toenails.
You will also need a nail file to smooth any sharp edges.
“Don’t share nail tools between family members; everyone should have their own pair of scissors/clippers to decrease the risk of spreading fungal/bacterial infections.”

Step 2: Remove nail colour
Please don't cut your toenails when coloured (unless it's a clear polish), as you can not see how long/short you are cutting them.
Step 3: Have a shower before you start
Cutting your toenails after a shower makes the job more manageable as your nails are softer. Dry your feet thoroughly, including between the toes, before getting started.
Step 4: Get comfortable
Consider ergonomics. Before starting, ensure you are sitting in a stable and comfortable position. Sitting on a low stool or using a footrest can make it easier to reach your feet safely.
Step 5: Trim your nails
Start trimming your toenails by cutting straight across, following the natural curve of your nail.
Use several small clips rather than trying to clip the whole nail in one go, which can cause the nail to tear or split.
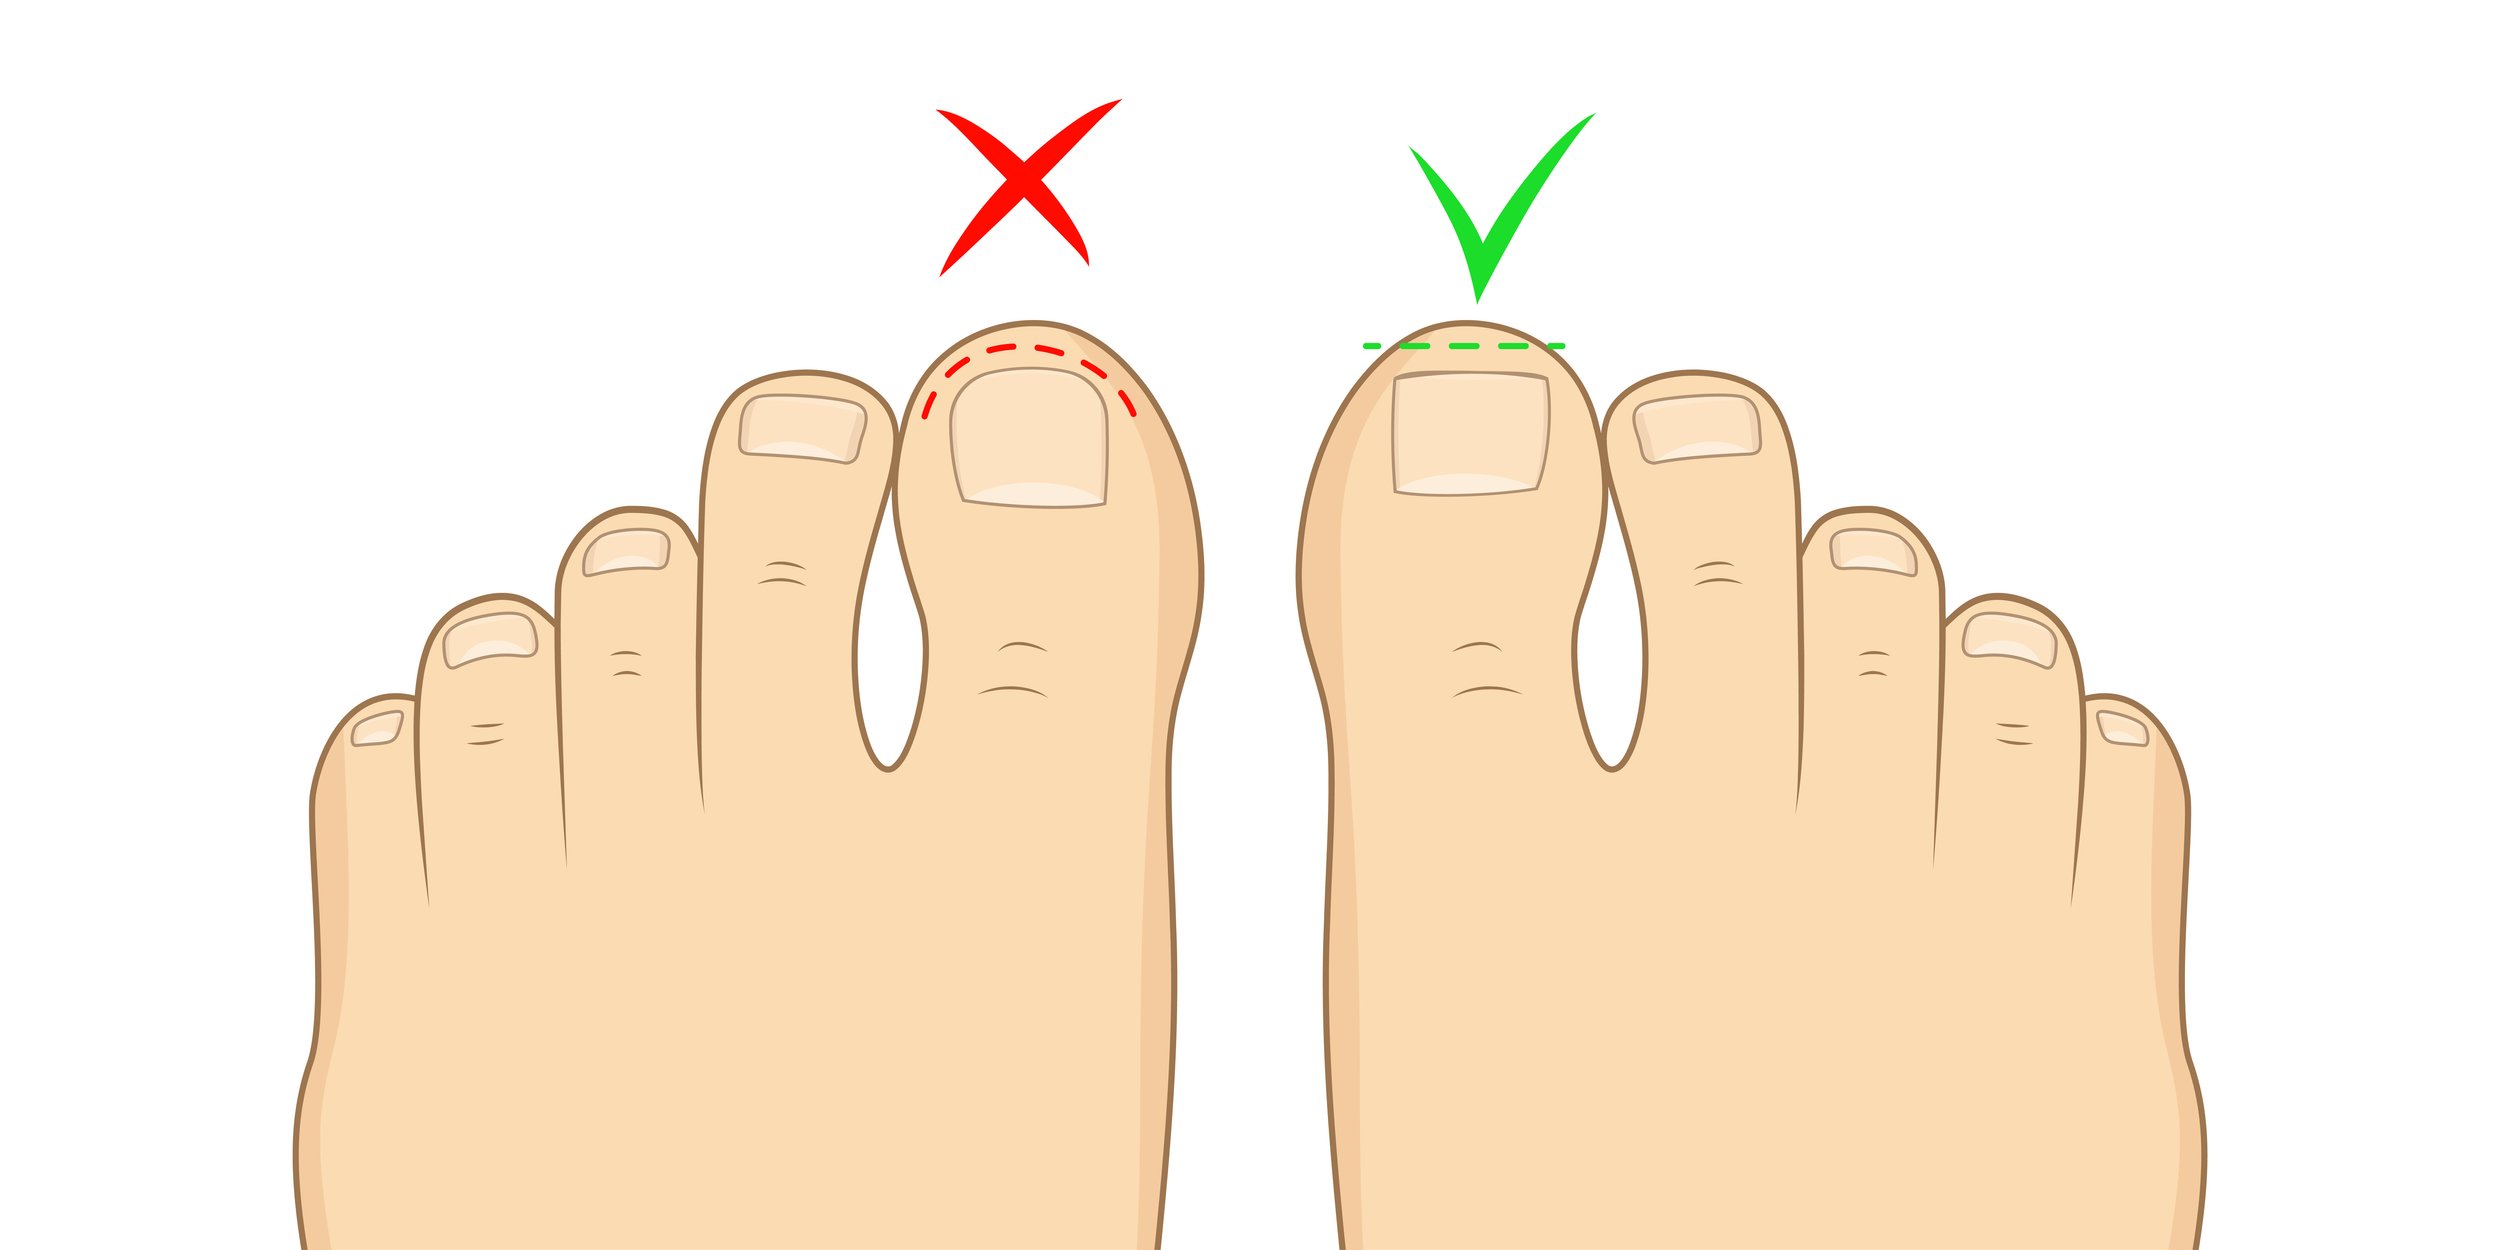
Avoid cutting down the sides of the nail or rounding the corners too much, as this can lead to an ingrown toenail.
Keep your toenails at a moderate length, not too short or long. You should leave about 1mm of white tip. Overly short nails can increase the risk of nail pain.
“Never cut your nails lower than “the sulcus” (which is groove along the side of the nail where your toenail meets the skin).”
Step 6: File Down Sharp Edges
Use a nail file to gently smooth any sharp or rough edges. Always move the file in one direction rather than going back and forth (which can damage your nails).
Step 7: Moisturise Your Feet & NAILS
Finally, while your shoes and socks are off, what a great opportunity to apply a moisturiser and/or nail serum!
Moisturisers and nail serums keep your skin and nails hydrated, helping to prevent cracks and splits and decreasing the risk of infections.
Step 8: Frequency
Healthy feet need nails cut every 4-8 weeks to maintain good nail health. Don't let nails grow too long between trims, as this can also cause nail pain.
If you have any nail issues, please consult your podiatrist for advice. Some complex toenails need professional care as they are too tricky to manage at home.
Happy cutting!